
Badges
In Chargekeeper, groups play a fundamental role in managing access and permissions, both for access to the charging stations and for the use of the supervision tool. This page explains in detail the various aspects related to groups and how they impact the overall operation of your supervision solution.
A badge is an identifier used to allow users to start a charging session on a charger. Chargekeeper supports different types of badges, each suited to a specific use:
- Physical: These are RFID cards that users can tap on the chargers.
- Virtual: Automatically generated for each user, they are used by the mobile app.
- Roaming: These are badges provided by roaming platforms (such as Gireve) for users of other mobility services.
- Payment terminal: Some payment terminals integrated into a charger can use specific badges to handle payments.
- Plug & Charge: specific to the ISO 15118 protocol.
Create a badge
The badge is used to identify a charging session on the charger.
- Go to the Badges module
- Click Create a badge
- Fill in:
- RFID number (or virtual identifier)
- Visual number
- Badge type: Physical, Virtual
- Status: Enabled
- Choose the configuration mode in the Assignment and usage tab:
- User
- Company
- Vehicle
- Associate depending on the case:
- the user,
- or the vehicle / the company
- a group
- Save
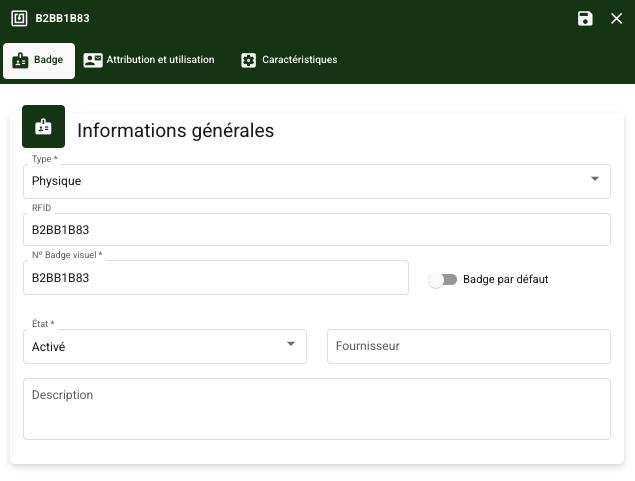
Identify/distinguish the RFID and the badge's visual number
| Type | Description |
| RFID |
The RFID number is the electronic identifier read by the charger when the user taps their badge.
If the RFID is incorrect, no charging session can start, even if the badge appears to be correctly configured. |
| Visual number |
The visual number is the number printed on the badge. It is used only for human identification. It makes the following easier:
It is never read by the charger. Changing the visual number has no impact on charging. |
Common mistake to avoid:
❌ Entering the visual number in the RFID field
✅ Always enter the real RFID number of the chip
Tip: how to identify a badge's RFID
If the RFID number is not provided by the badge manufacturer, you can read it yourself.
Solution 1 - With an Android smartphone
Use a free NFC app, for example:
- NFC Tools
- NXP TagInfo
Steps:
- Install the app
- Enable NFC on the phone
- Hold the badge near the phone
- Read the UID / Identifier displayed
- Copy this value into the RFID Number field in the supervision
Solution 2 - Identify a badge's RFID by tapping it on the charger
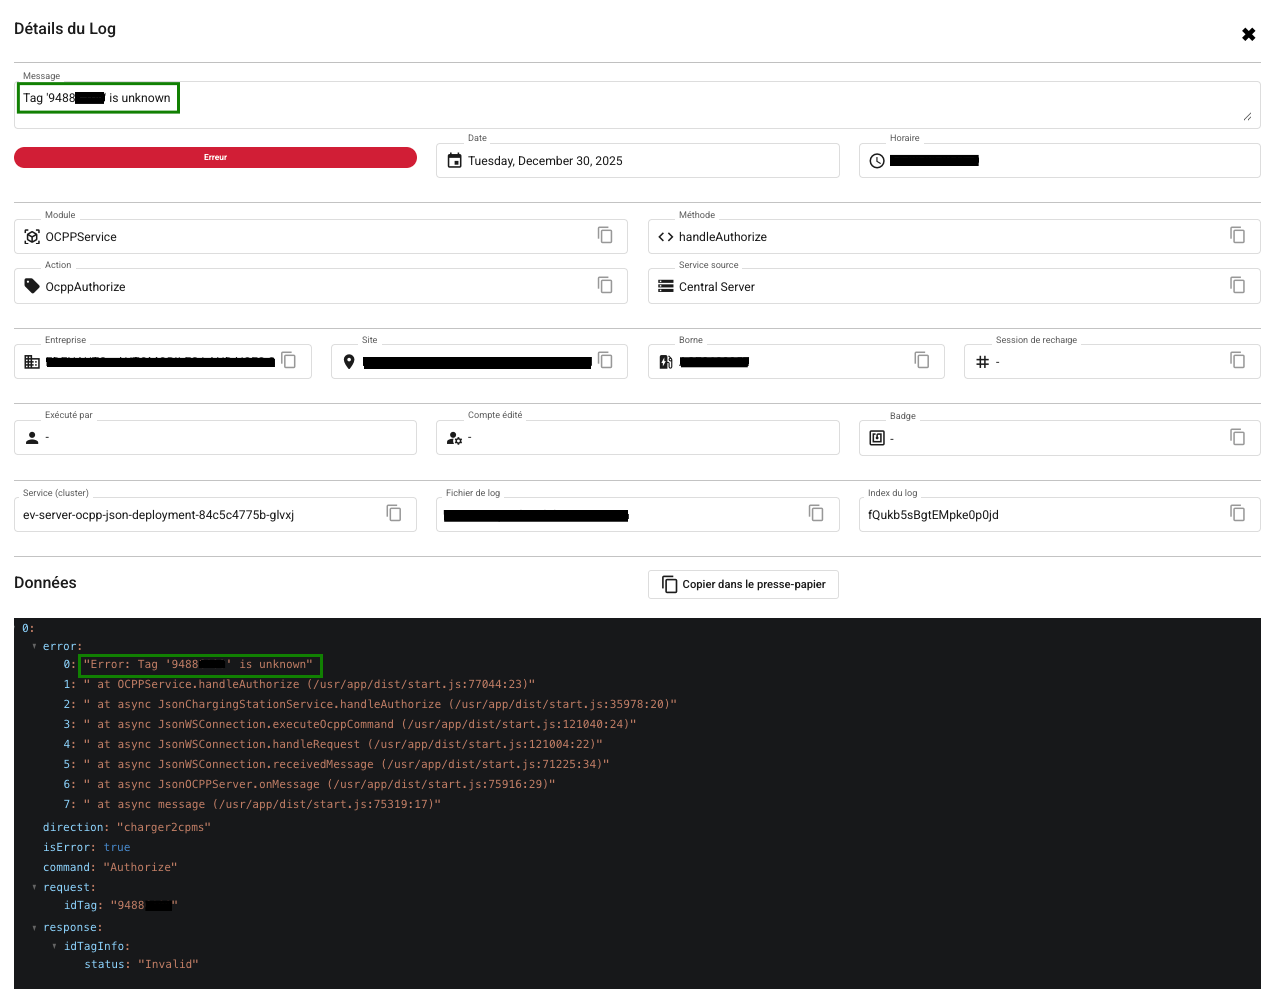
If the badge does not yet exist in the supervision, you can identify its RFID directly via the logs.
- Tap the badge on the charger
- Go to the Logs module
- Filter on the 'OcppAuthorize' action
- Check the log details (The log states that badge 9488… is unknown and that the start is refused)
The badge's RFID number appears in the log information and can be used to create the badge in the supervision.
Import badges
Preparing the CSV file
To import badges into Chargekeeper, it is essential to prepare the CSV file correctly. Here are the required characteristics for the file:
CSV file characteristics:
- File type: The file must be in CSV format.
- Separator: Use a comma as the column separator.
- Mandatory header: The file must contain a header row with the column names.
Mandatory columns:
- id: The unique identifier of the badge.
- visualID: The number visible on the badge (usually printed on the RFID badge).
Optional columns:
- description: A description of the badge.
- email: The email address associated with the badge user (if applicable).
- firstName: First name of the user associated with the badge.
- name: Last name of the user associated with the badge.
Example CSV file (to open in Excel):
id,visualID,description,email,firstName,name
685B3D1623,CHS9YYW4,Employee,example@company.com,John,Doe
59835A28E25,CHG9DPH1,Visitor,,,
Import the badges into Chargekeeper
Once your CSV file is ready, you can proceed with the import via the Chargekeeper interface. Here are the steps to follow:
Step 1: Access the import interface
- From the Chargekeeper dashboard, click Badges in the left-hand menu.
- In the badges interface, click the Import button located at the top of the page.
Step 2: Import configuration
- Choose a file: Click Choose a file and select the CSV file you prepared.
- Automatically enable users and badges:
- Check the Automatically enable new users option if you want the users associated with the badges to be automatically enabled in the system.
- Check the Automatically enable new badges option so that newly imported badges are immediately active in the system.
Step 3: Start the import
- Once the options are configured and the file is selected, click Import to start the import process.
- Chargekeeper will validate the file. If everything is correct, the badges and users will be added or updated in the platform.
View and manage the imported badges
Once the import is complete, you can view the badges in the main Badges interface. The badges are listed with their status, their identifier, and the associated information.
Available actions:
- Edit: Click the edit icon to modify a badge's details.
- Disable: You can disable a badge if you no longer want it to be used.
- Delete: Click the delete icon to permanently remove a badge.
Troubleshooting
Import errors:
If the import fails or if some badges are not imported, check the following:
- Make sure the file is indeed in CSV format.
- Check that all mandatory columns (id, visualID) are present and correctly filled in.
- Make sure there are no special characters or unwanted spaces in the identifiers.
Error file: If errors occur during the import, Chargekeeper can generate a report file listing the errors encountered. You can download this file to identify and fix the problems before trying again.
By following these steps, you can easily import and manage your badges in Chargekeeper. If you have any questions or issues during the import, feel free to contact our support team.
