
Charge points and connectors
General information
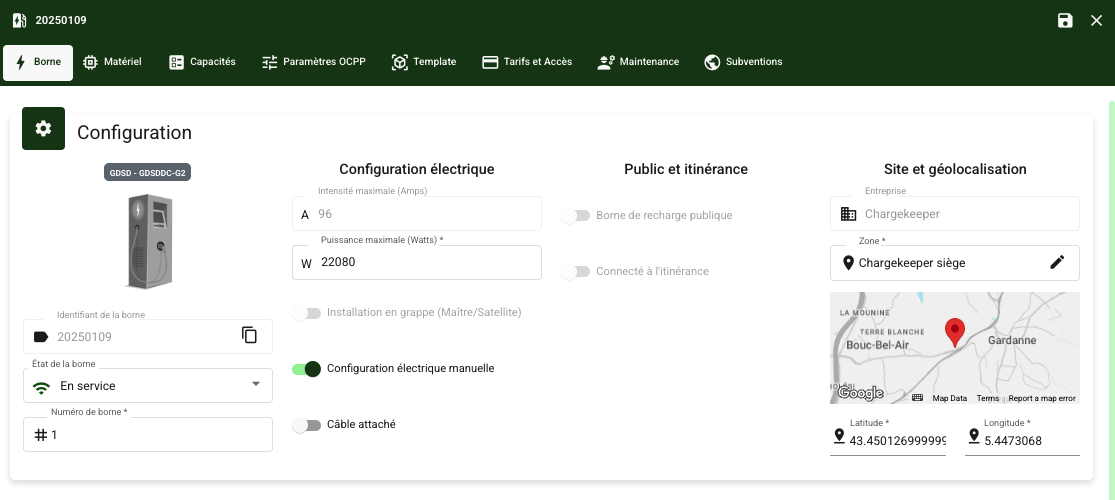
| Parameter | Description | Editable |
|---|---|---|
| Identifier | A numeric identifier that makes it easy to locate the charging station on a site. | ✅ |
| Custom identifier | In the Hardware tab, a custom identifier can be configured (digits and letters) | ✅ |
| Maximum current (Amps) | The maximum current the charging station can deliver, expressed in amperes. Calculated automatically based on the maximum power and the charge point configuration. | ❌ |
| Maximum power (Watts) | The maximum power supported by the charging station, expressed in watts. In automatic mode, the max power is calculated by analyzing the charge point and connector configuration. In manual configuration, the max power can be edited. | ✅ |
| Charging station status | Defines the operational status of the charging station (In service, Out of service, Under maintenance, In stock). |
✅ |
| Charging station no. | Customizes the charging station number to simplify management and maintenance. | ✅ |
| Master/Satellite configuration | Indicates whether the charging station is in master or satellite mode. This option can only be enabled if the Master/Satellite capability is enabled (see below). | ✅ |
| Manual configuration | Allows the charging station parameters to be edited manually when needed. Useful when there is no automatic pre-configuration template for the charging station model, or when the charging station has been modified at the factory or through a retrofit. | ✅ |
| Attached cable | Allows you to identify whether the charging station has only the connector or the cable associated with the connector. This requires the user to anticipate and know whether they need to bring their own cable or not. | ✅ |
| This charging station is public | Indicates whether the charging station is accessible to the public or reserved for private use. The charging station cannot be public if its zone (site) is not. | ✅ |
| Roaming | Enables the visibility of the charging station on roaming platforms. Requires that the charging station and its zone both be set as "public". | ✅ |
| Company | Company associated with the zone. It can only be changed from the zone. | ✅ |
| Zone | The geographic zone (site) assigned to the charging station. Required to use the charging station. | ✅ |
| Latitude | GPS coordinates of the charging station to locate it precisely on a map. | ✅ |
| Longitude | GPS coordinates of the charging station to locate it precisely on a map. | ✅ |
Charge point and connector configuration
When a charging station is recognized and an automatic configuration template is available, the charge points and connectors are configured automatically. This automatic configuration relies on:
Receiving an OCPP "Boot Notification"
- This message contains information about the brand, model, and firmware version of the charging station.
Receiving OCPP connector notifications
- These notifications make it possible to identify the available connectors.
- This process can sometimes take time depending on the charging station model.
Manual configuration
In some cases, manual configuration is necessary, in particular when:
- No configuration template is available for the charging station.
- The charging station is connected in single-phase instead of three-phase (the default configuration for templates).
- The charging station has been modified at the factory or through a retrofit, so that it no longer matches the default template.
- A specific master/satellite cluster configuration is required.
Note: To configure a charging station manually, you must enable the "Manual configuration" option, which lets administrators customize the parameters.
Managing charge points and connectors
Through the Chargekeeper interface, you can:
| Actions | Description |
| Create a new connector |
From the charge point action menu, you can choose to create a new connector. 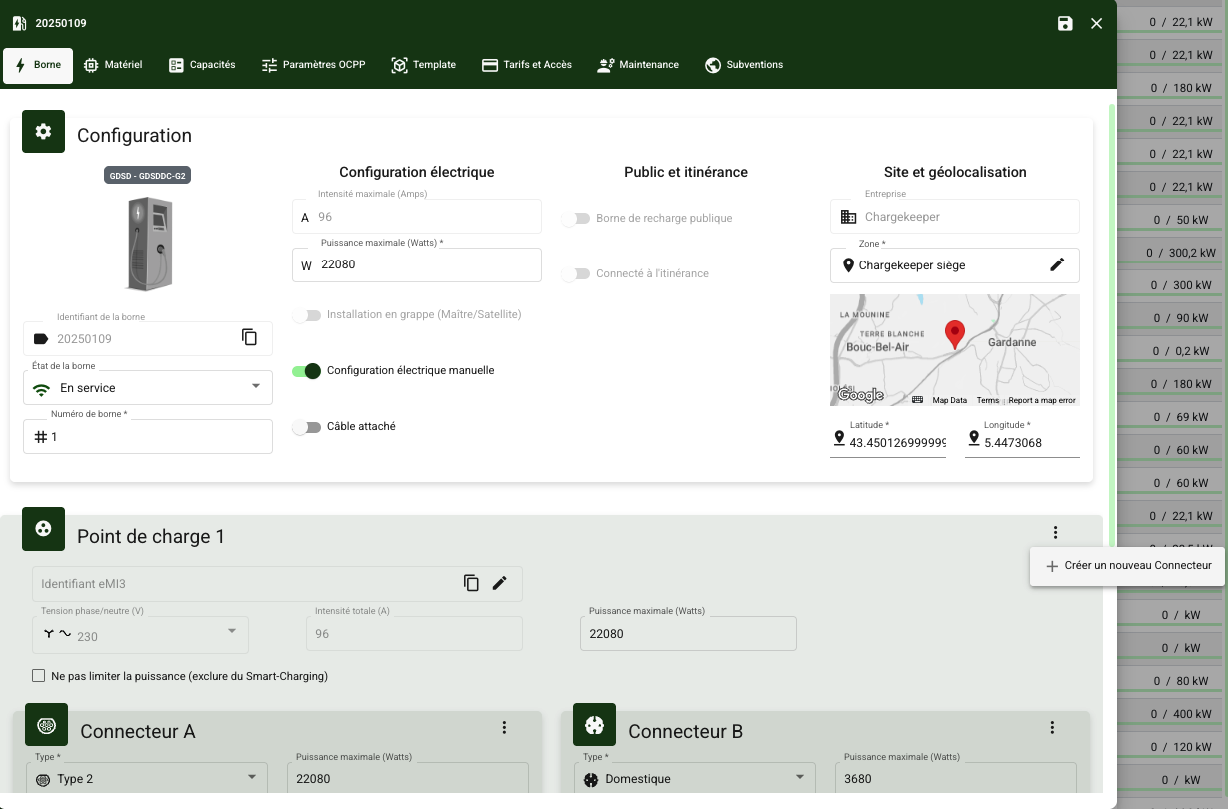 |
| Delete or move a connector |
From the connector action menu, you can choose to delete the connector or move it to a new charge point. 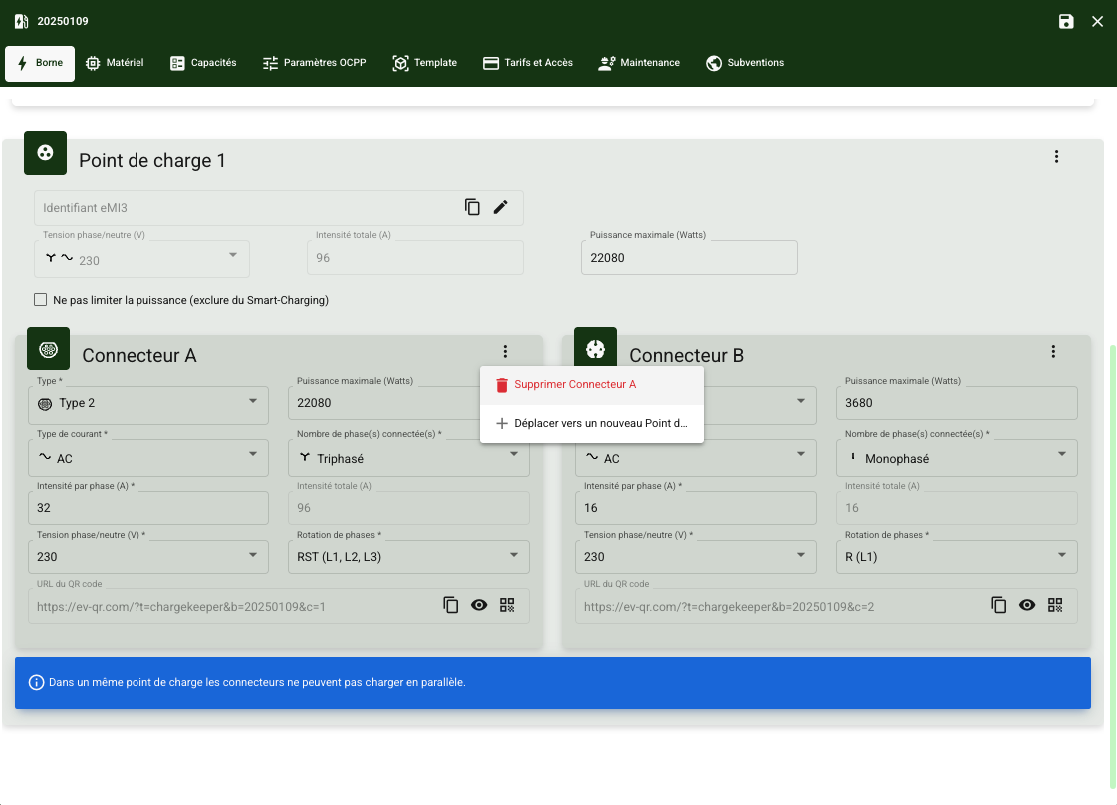 |
| Edit a charge point or a connector | You can edit a connector's configuration (Type, current, amperage, phases, power, etc.) |
Note: When several connectors are defined within the same charge point, they cannot charge vehicles in parallel.
Charge point configuration parameters
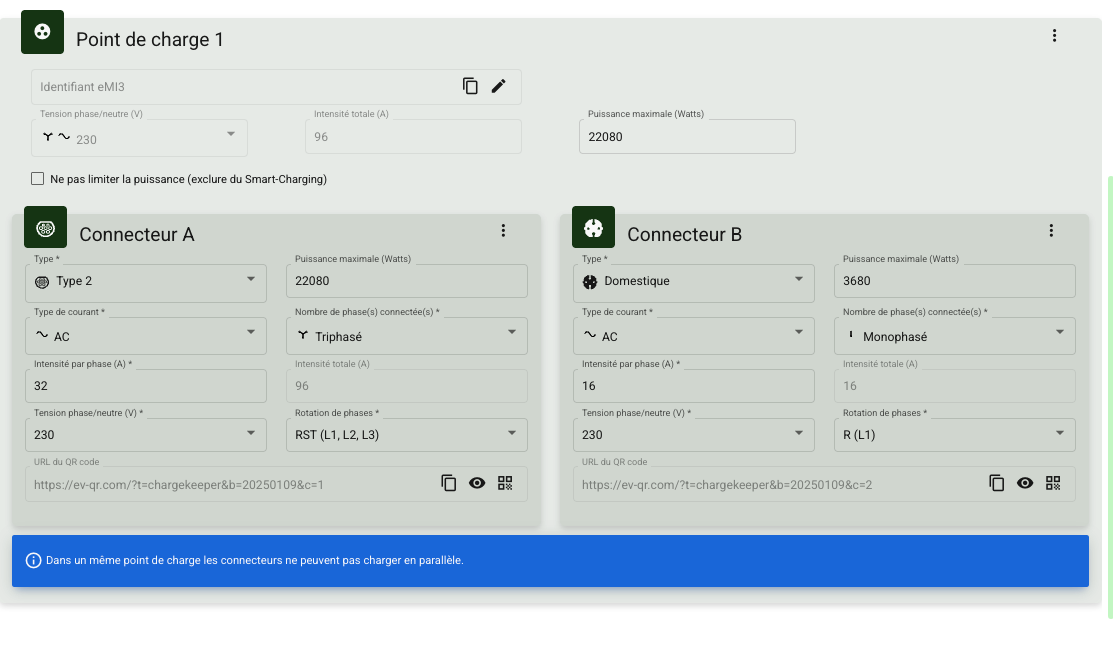
A charge point groups several connectors and has the following parameters:
| Parameter | Description |
|---|---|
| Phase/neutral voltage (V) | Nominal voltage applied to the entire charge point. Calculated based on the connector voltages. |
| Total current (A) | Maximum total current available for all connectors. Calculated based on the connector currents. |
| Maximum power (Watts) | Defines the maximum power of the charge point. Calculated based on the max power of the connectors. |
| Charge point identifier | Unique identifier assigned to the charge point. Generated automatically based on AFIREV identifiers and the eMI3 format. Mainly used by the OCPI roaming protocol. |
Connector configuration parameters
Each connector is associated with several essential parameters:
| Parameter | Description |
|---|---|
| Connector type | Defines the plug type (Type 2, CHAdeMO, CCS, Domestic, etc.). |
| Current type | Specifies whether the connector supplies alternating current (AC) or direct current (DC). |
| Current per phase (A) | Maximum current supported per phase (expressed in Amperes). |
| Phase/neutral voltage (V) | Nominal voltage between phase and neutral (expressed in Volts). |
| Maximum power (Watts) | Calculated automatically based on the voltage, the current, and the number of phases, but can be corrected manually. |
| Number of phases | Defines whether the connector is single-phase or three-phase. |
| Total current (A) | Calculated automatically based on the current per phase and the number of phases. |
| Phase rotation | Mandatory configuration for Smart Charging strategies. |
Connector QR Code
Each connector has a unique QR Code, generated automatically by Chargekeeper. This QR Code plays a key role in several essential features:
Contactless payment (Scan-and-Pay)
The user can scan the QR Code with their smartphone to go directly to the online payment page. This enables a quick payment without needing an RFID badge.
Quick identification from the mobile app
By scanning the QR Code via the Chargekeeper mobile app (or its white-label version), users can instantly identify the relevant connector to start a charge or check its status.
Redirection to the mobile app download
If the user does not yet have the mobile app, the QR Code can redirect them to the app store (Google Play or Apple App Store) to download it.
From the supervision interface, you can:
Download the QR Code
- Ideal for printing and physical display on the charging station.
Copy the QR Code URL
- This URL can be used in digital media to redirect users to the connector's payment or information page.
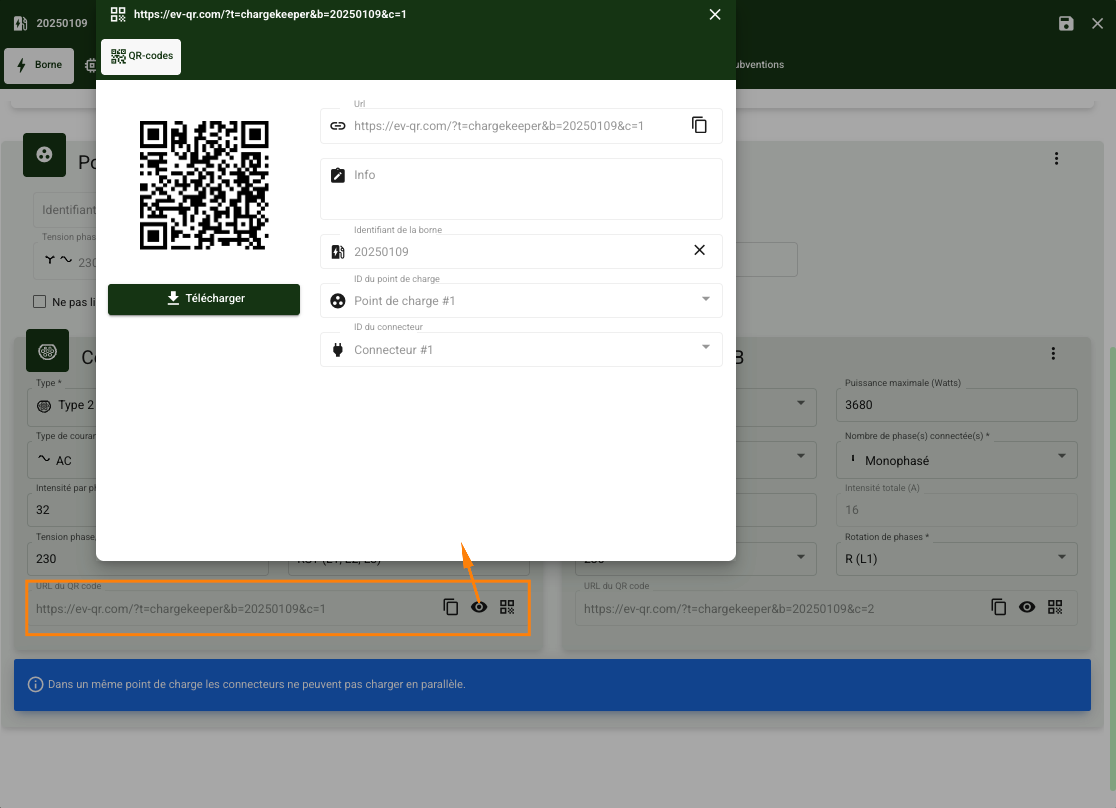
To generate and associate QR codes manually, go to this page: https://support.charge-keeper.com/e/en/bornes/QRcodes
Best practices and recommendations
Favor automatic configuration
- Check whether a template is available before enabling manual configuration.
Make sure phase rotation is configured correctly
- Incorrect rotation can lead to charging errors and poor power management.
Limit the power manually with caution
- If the limitation is enabled, make sure it is compatible with the site's electrical specifications.
